|
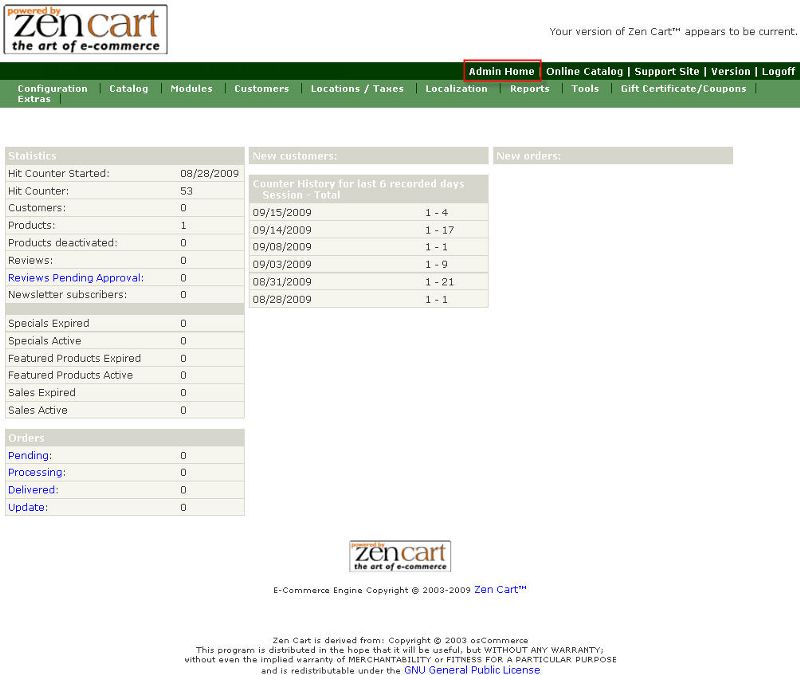
This is your Home Page |
|
|
|
|
|
This tutorial will show you how to add pricing to different sizes of the same item.
We will be using artwork for examples of how the price varies with the size of art work.
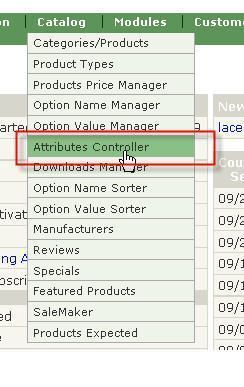
This is your Attributes Main Page.
|
|
|
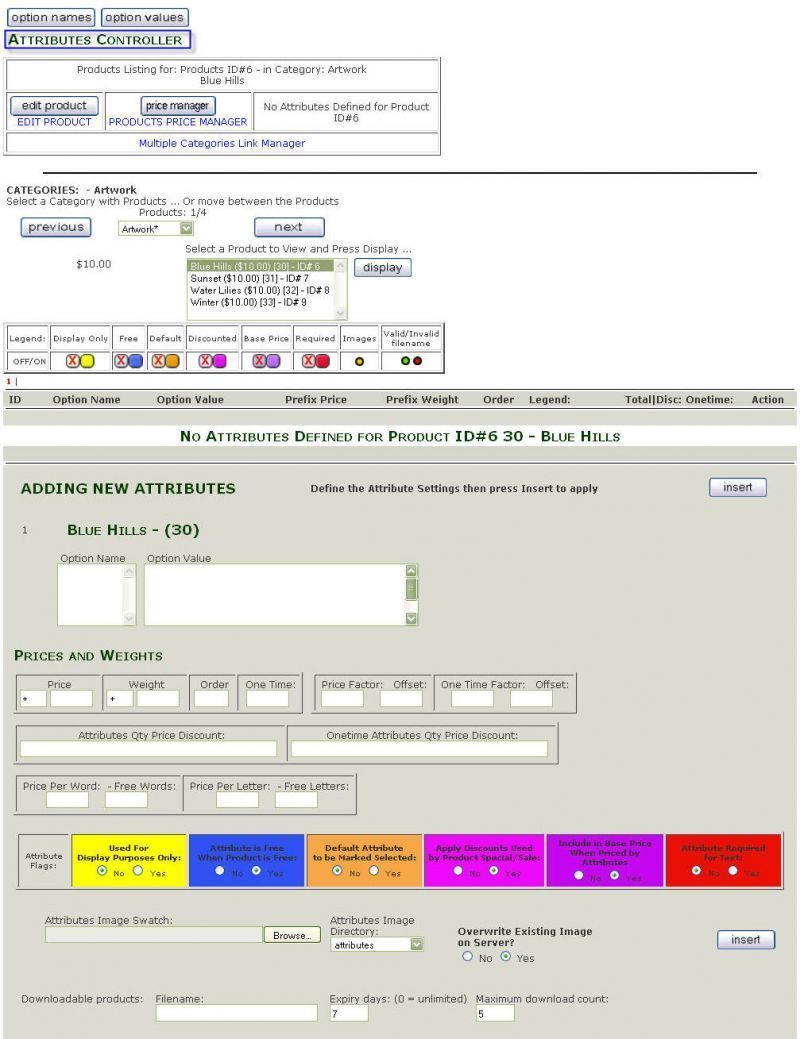
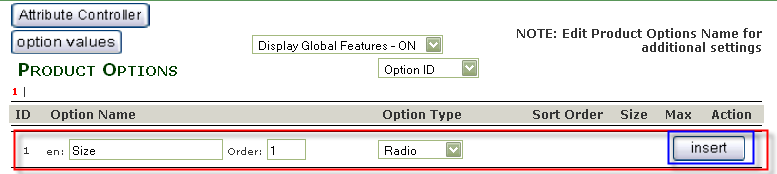
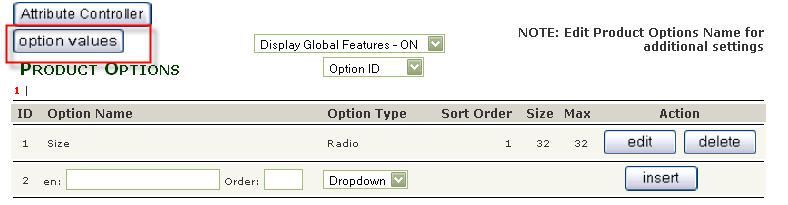
This is your Attributes Controller Main Page. |
|
|
|
|
|
|
|
|
|
|
|
|
|
|
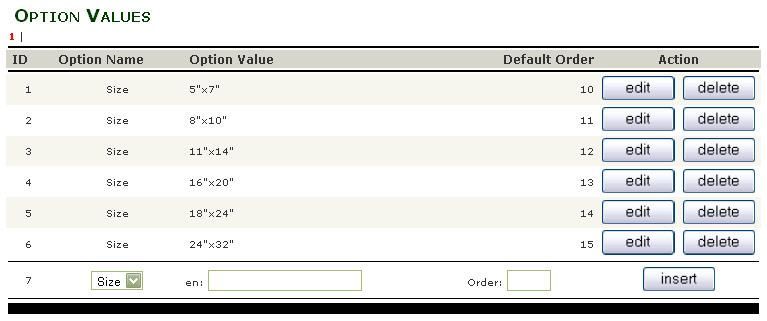
| This is your Option Values Main Page
|
|
.
|
|
|
|
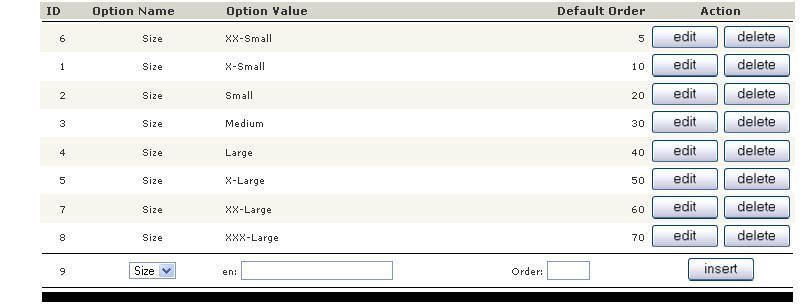
Second Values Option Example: |
|
|
|
You have just created your option values. |
|
Now we are going to put prices to each of the values. |
Click here for more Tutorials for Zen Cart
or
Continue on this page.
How to Add Different Prices to Different Size Values
Make sure you have your shopping cart window open on a separate page or tab, so you can view the work you're doing. Remember to REFRESH / RELOAD your page whenever you make changes to the controller page.
|
|
|
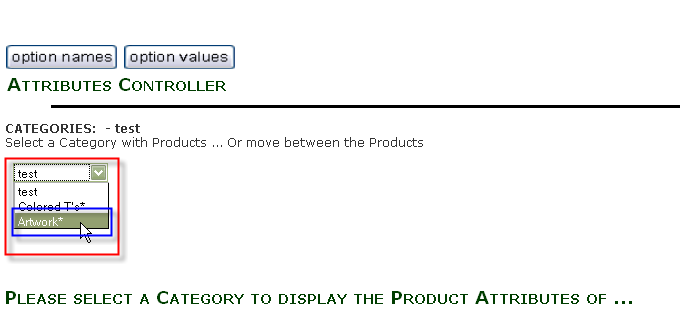
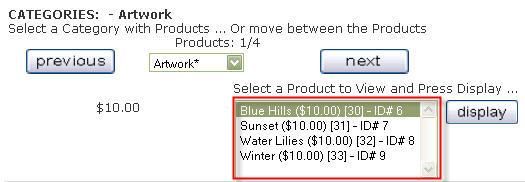
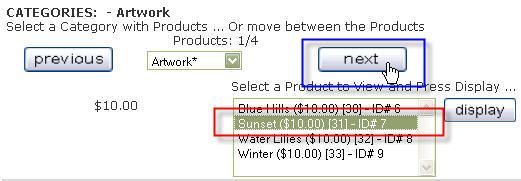
This is your Attributes Controller Selection Menu Under your Categories: - test
|
|
|
This is your Attributes Controller Main Menu |
|
|
|
|
|
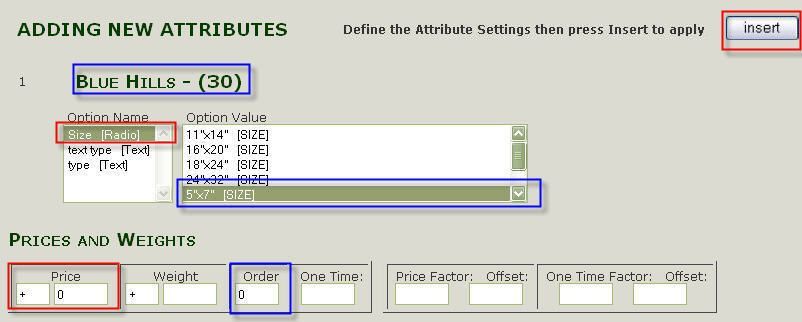
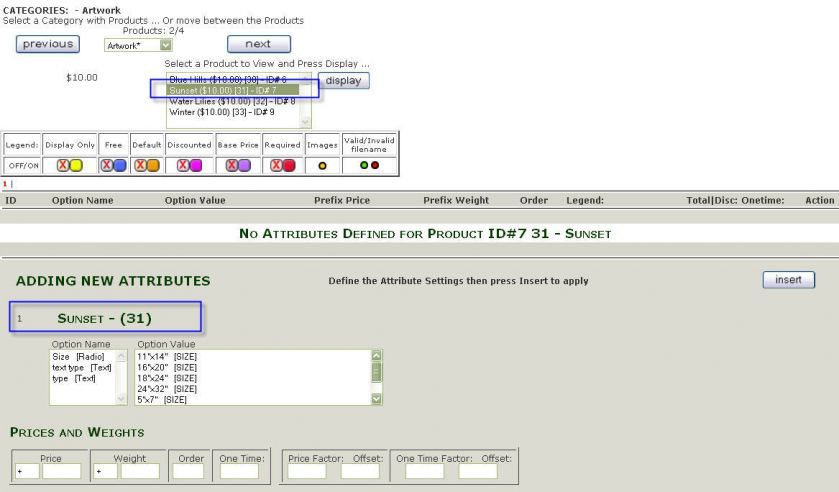
Adding New Attributes should show up
|
|
|
|
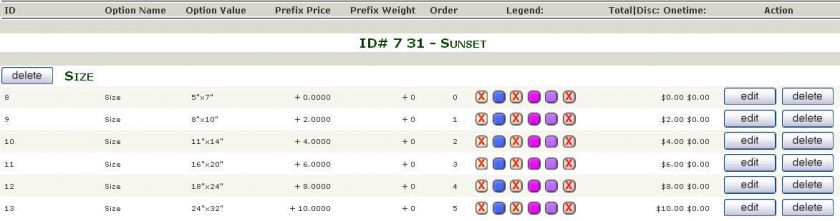
Once you select Insert you will see that you have created your first attribute setting. Scroll down the page and you will see the same menu you just filled out. |
|
|
|
|
|
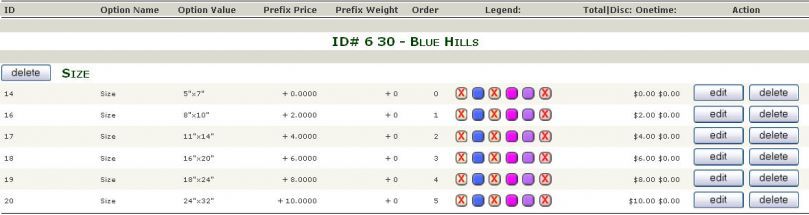
| Once again this should show up under your ID # with the item |
|
|
|
Continue with the same steps above. The Frame size is going up again. |
|
|
|
|
|
|
|
|
|
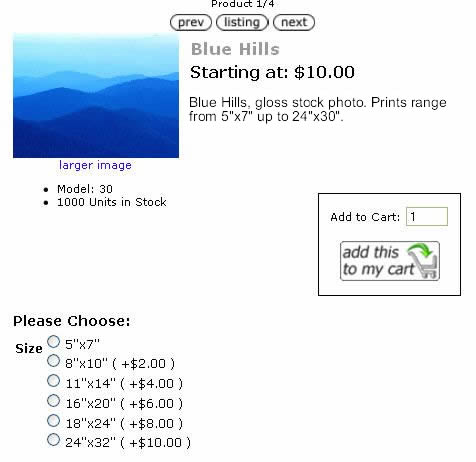
If you were to go on your site and look at your shopping cart, you would see something similar to this: |
|
|
Go back to step 5 and repeat the same process using a different category. Using your websites shopping cart as a reference is always important. |
|
|
(:::Example:::) Always make sure that you are editing the correct Item Sunset - (31) |
|
|
|
Repeat the steps until the items are all complete with anttributes.
You have just created your own Attributes for your items.
|
|
|